Lighting for the White Screen Studio Look


The white screen studio look is a tried and tested style used in many corporate and talking head videos. There’s a reason why so many people use it - when done properly it looks professional and high end. However, just shooting in an infinity cove or against a white backdrop isn’t enough to give it the ‘look’. Yes, you’re going to need a decent camera, but the secret to making it look professional is to create an effective lighting setup that ensures your subject jumps out to the viewer. Whether you’re in a studio or are doing it yourself on location, learn to light this effectively and your clients will keep coming back for more.
For this article I will assume that you want a high key image with not too much contrast and your subject is to be fairly evenly lit.
1. Gain control of your location
Lighting is all about control. If you’re in a studio then this part is easy (turn the house lights off) but if you’re on location you’ll need to check a few things before you start. This could even be the most difficult part of the whole set up!

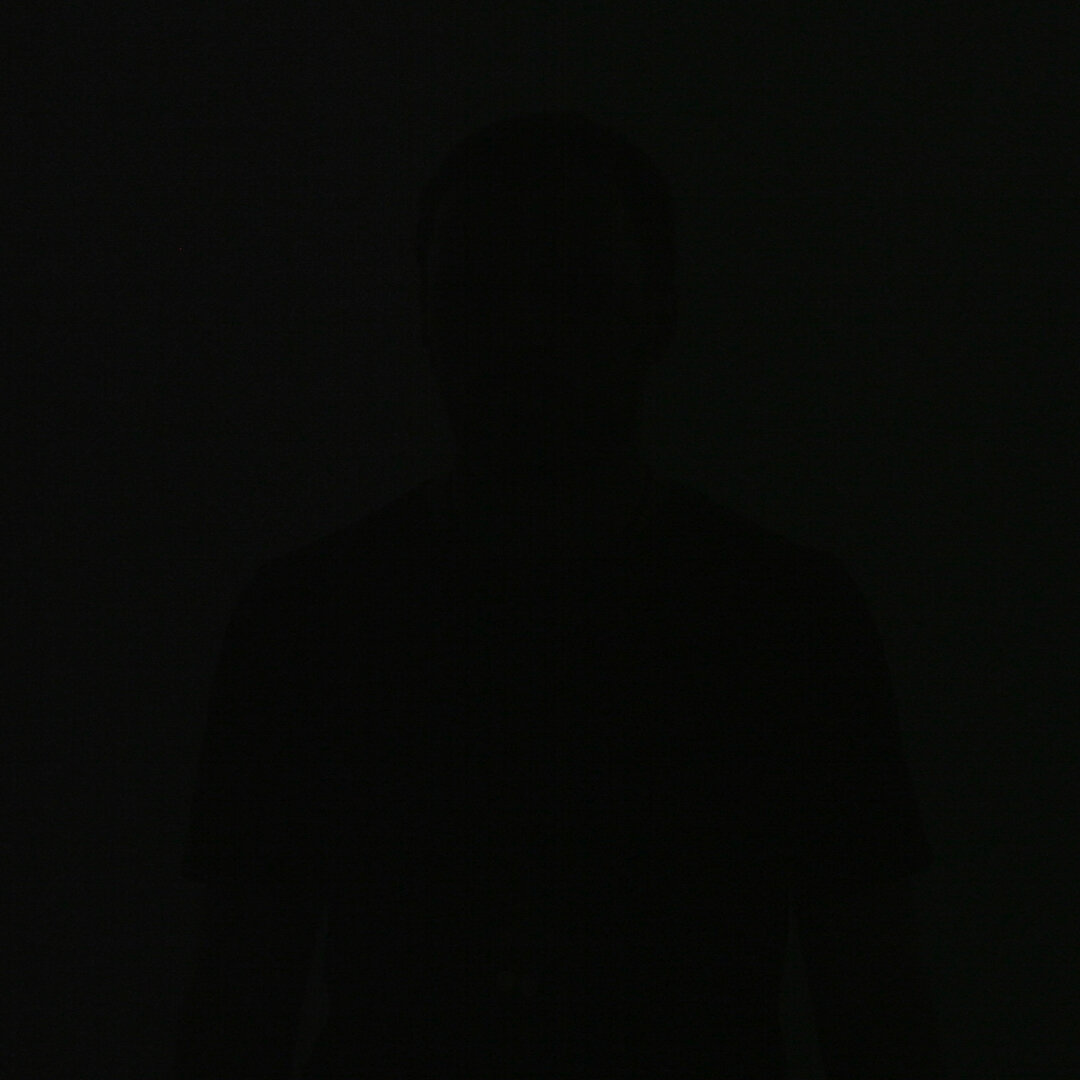
With complete control of the lighting in the room, you start with darkness. A blank canvas. Perfect!
Firstly, your room needs to be big enough to allow for the backdrop and the size of your frame will determine the width of this. Then you’ll need to get the camera in, some lights, a mic stand, a makeup artist, the client, the client’s PA - basically, the room is going to fill up pretty quickly! Before you set up anything make sure you have access to a room that is large enough to accommodate these things.
You’ll then need to make sure you have complete (or as near to complete) control of the lighting in that room. House lights need to be turned off, any curtains or blinds need to be closed and if necessary blacked out with drapes, cloth, flags or whatever you can get your hands on that will stop unwanted natural light spilling in. The problem with natural light is that as the sun moves throughout the day it changes the look, and this can affect the consistency of your shots.
Another thing to check is that all of the light sources at your disposal can be balanced to the same colour temperature, either daylight (5500K) or tungsten (3200K). If your lights aren’t bi-colour then you’ll need to get hold of some gels, either CTB (colour temperature blue - to convert tungsten lights to daylight) or CTO (colour temperature orange - to convert daylight sources to tungsten). If we wanted to get complete, absolute control then it may be worth getting hold of some minus green gel too (to add some magenta to any LEDs that give off a green tint) so we end up with completely white light overall.
Lastly, make sure your talent is wearing clothing that will provide sufficient colour contrast so they jump out from the background. Dark or bold colours are preferrable. It may seem obvious, but paler colours and white are best avoided!
2. Light the background separately from the subject

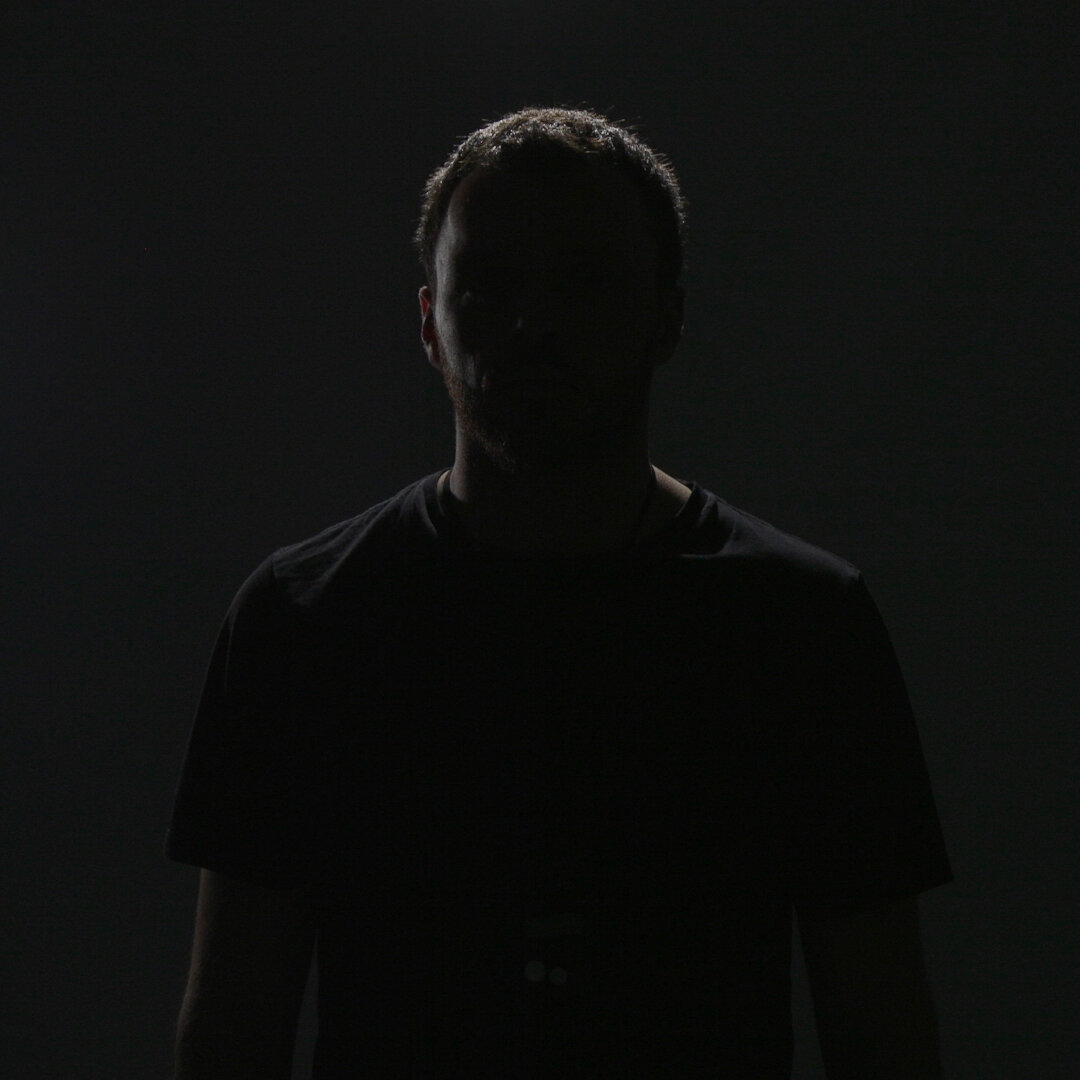
We got a bit of spill, but the size of our frame required for the client (we needed room to animate text on the white - not visible in this image) meant we couldn’t move the camera much further back. As this wasn’t greenscreen and our subject was pretty underexposed we were in a good place to move on.
With the backdrop set up, we now need to light this and position our subject. 2 soft lights should be positioned equidistant on each side of the backdrop to light it evenly. Brightness levels should be similar and this can be checked using a waveform on the camera or monitor, or by using a light meter. The subject can’t be standing too close to the backdrop because otherwise when we come to light them they will throw shadows onto it and that doesn’t look great.
Naturally, to make your white look as white as can be the background will need to be significantly brighter than the subject, so getting your levels right here is important (this can be refined later) but if it’s too bright this will increase the likelihood of spill. A small amount of spill on this occasion is OK but too much and it will make the edges look soft and you risk not being able to separate the skin tone from the white when it comes to colour correction. If this were a green screen shoot any spill from the backdrop would be a disaster (more in an upcoming post). Either way, if you want to and are able to achieve 100% control of your subject then bring them forward enough so there is no spill.

The key light: as large and as soft a source as you can get (sorry about the model by the way!)
3. Add the key light
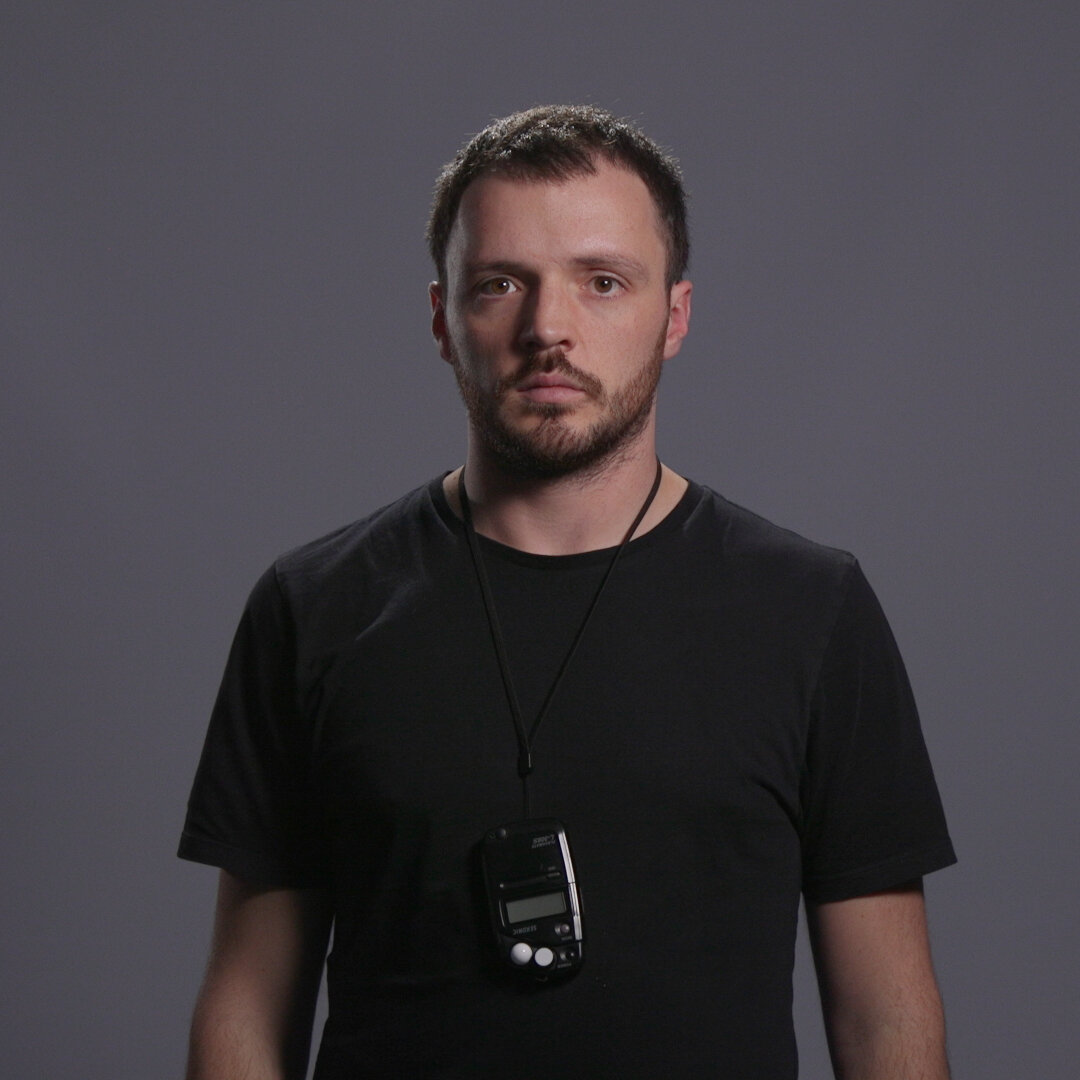
It’s time to start lighting our subject, first with the key light. This is the main source of motivated light in a scene. In this case, we want everything to look soft so it wraps around the subject nicely. A large softlight is the ideal source. In this case an LED panel with a layer of heavy diffusion was positioned just above the eyeline, to the right of camera at an angle of about 45 degrees from the subject. If you look at the nose, a soft shadow has been created by the key light into the far side of the face, which is the most flattering place for the shadow to be. You can also see how the light gradually drops off on the left side of the face.

It’s now looking pretty good, but there’s more to do.
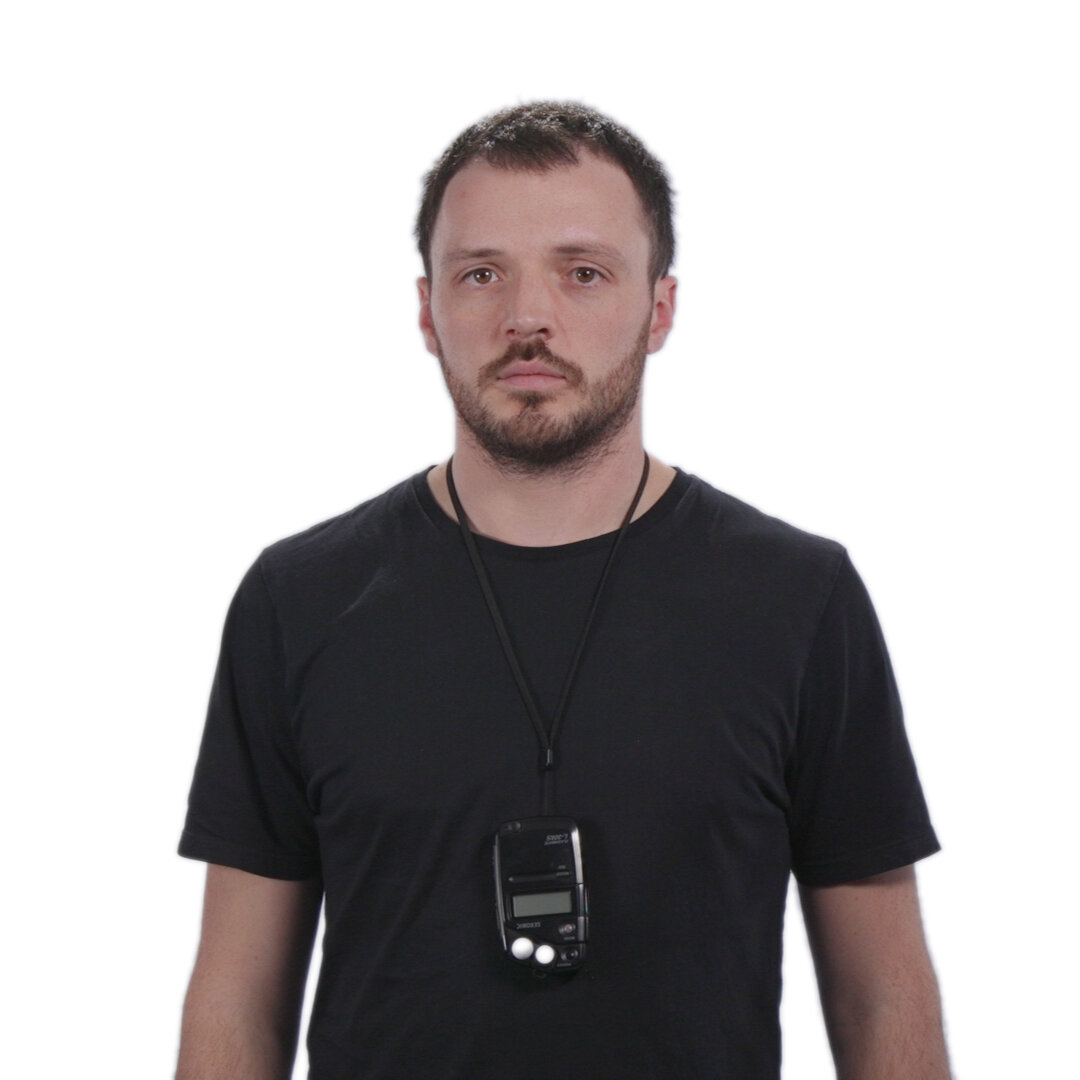
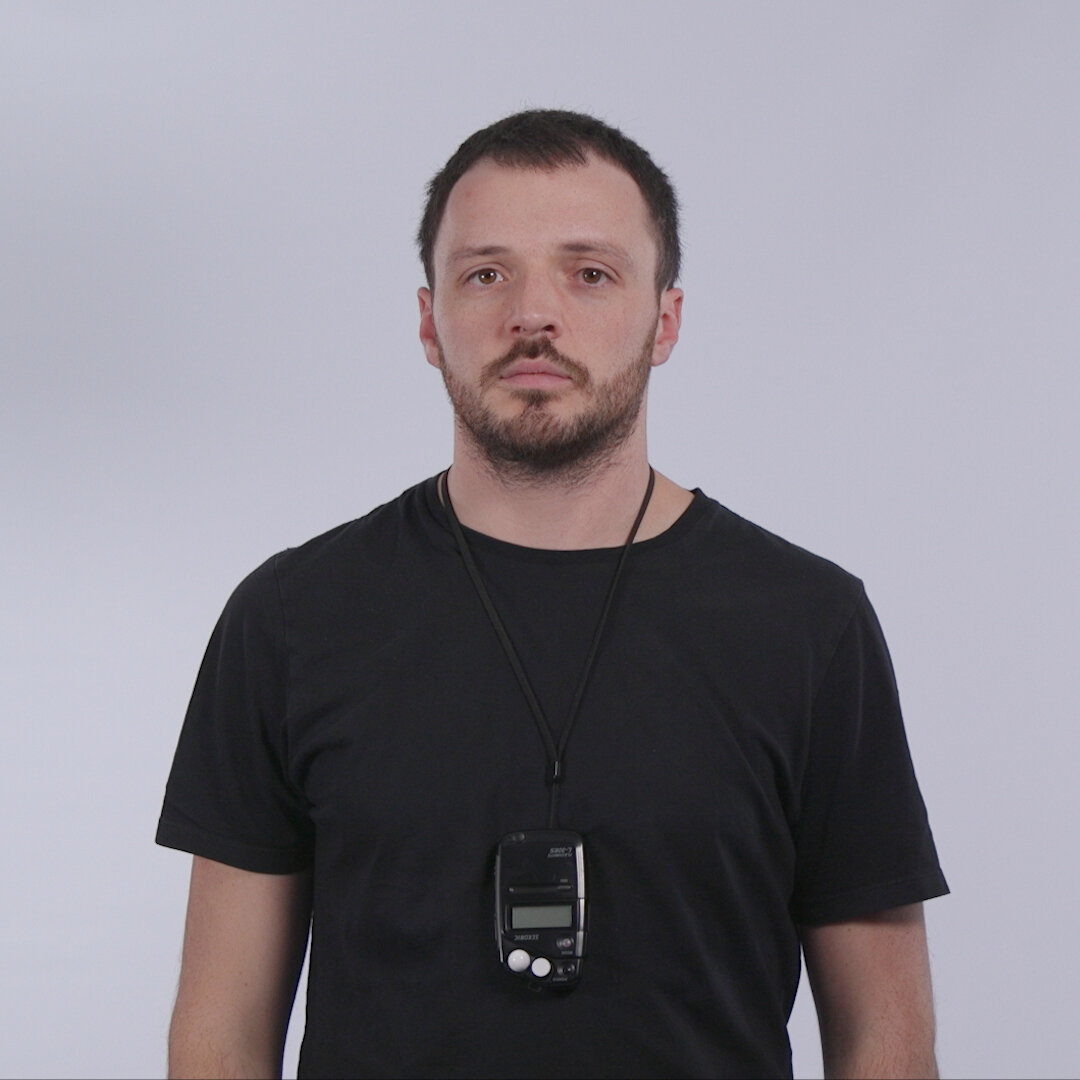
4. Fill in the shadows
Because we’re going for a high key, low contrast look we’re going to want to fill in the shadows created by the key light by using another soft source. A reflector or bounce board is often a good choice however in this case another LED panel with a layer of heavy diffusion was added, this time on the left of frame and slightly under the subject’s eyeline. Because soft light falls off much quicker than hard light and the subject is stood away from the backdrop there are no shadows to contend with.
This is where many people would stop because we can now see the subject and the backdrop is lit. But there are further steps to go to really make this image jump out, as it’s a little flat.

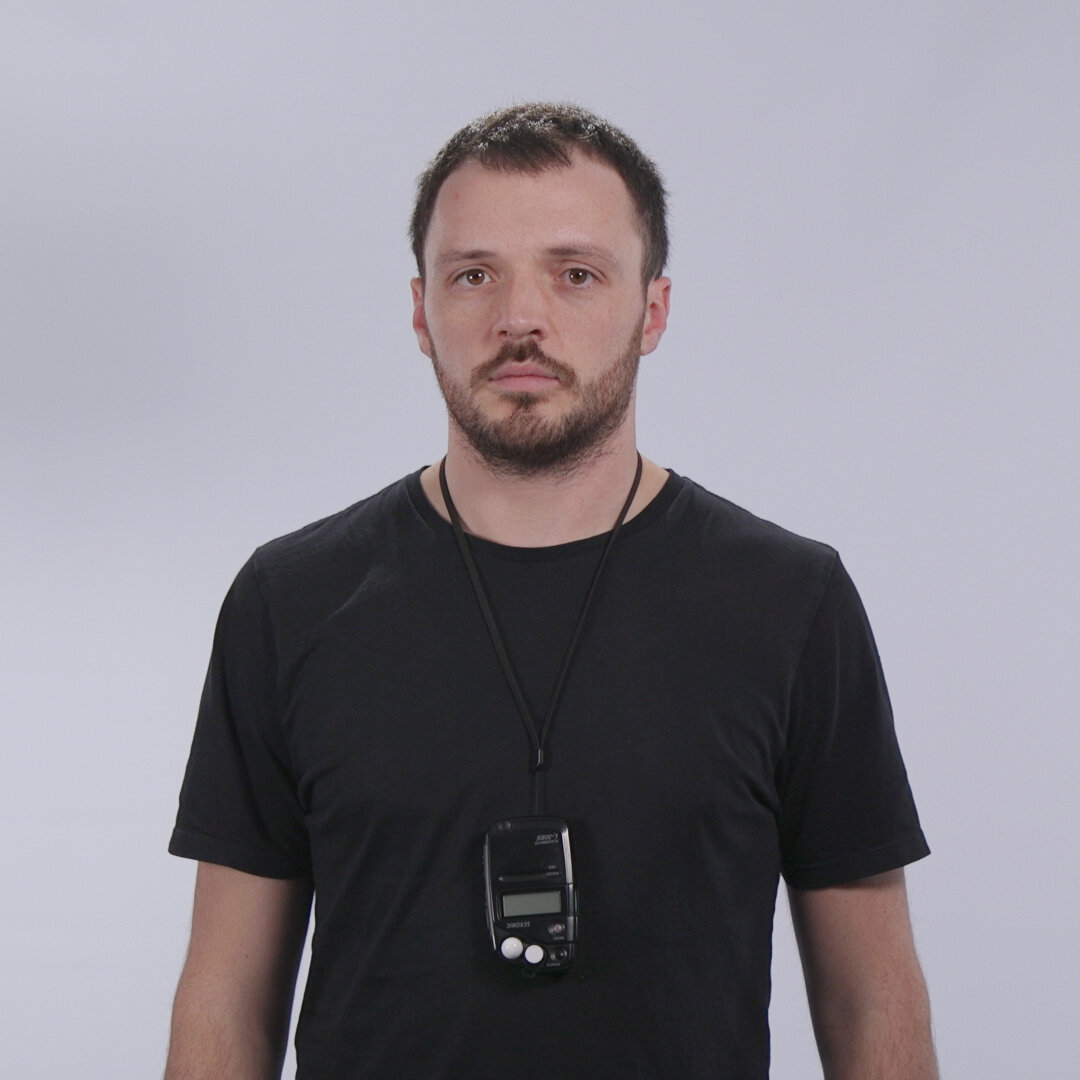
Although subtle here, the 3/4 backlight adds some definition to the left side of the face. The background is doing some of the work for us on the right.
5. Add a 3/4 back light (or two)
To truly make your subject pop, it’s time to start adding backlights. Whether you use 1 or 2 depends on a number of things; your taste, how many lights you have in your arsenal, the framing and the time available. Personally I try to add at least one whenever I can.
In this case we’ve added a single 3/4 backlight; this is positioned at subject height about 45 degrees off to the left of frame so that it catches the side of the face and shoulders. If we were shooting something dramatic this could be quite a bright light, however for our needs it just needs to add a subtle accent. We used a dedo DLH4 (tungsten hard light) to cut through effectively, added some CTB to match it with our daylight LEDs and softened it slightly with some diffusion. We also made sure it didn’t hit the end of the subject’s nose and spotted it to avoid creating any lens flare.

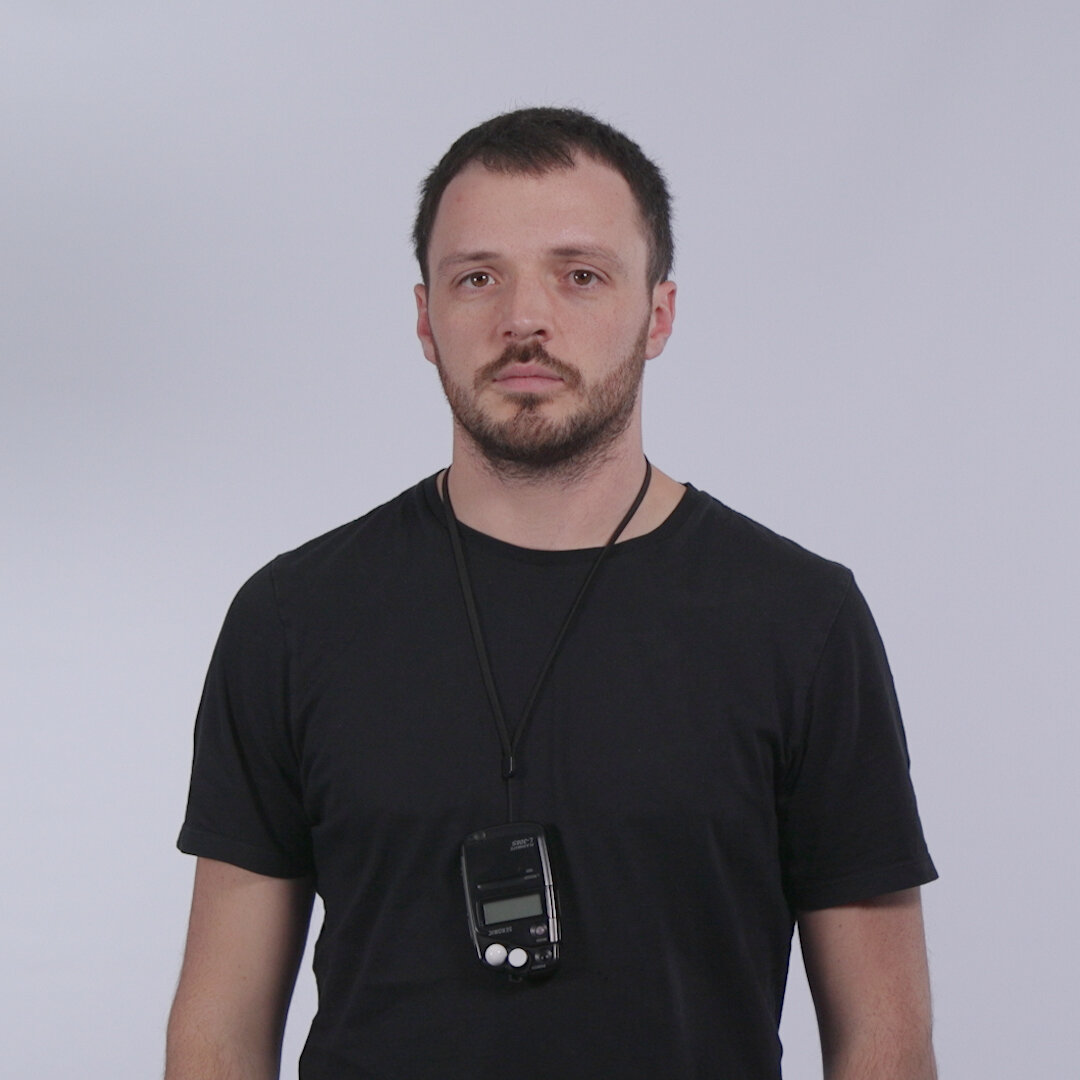
The 3/4 backlight on its own for reference.
To give you a better idea of what this light is actually doing this image shows the 3/4 backlight on it’s own, creating a thin stripe down the side of the subject’s body, although more noticeable on the face due to the dark t shirt. For a more dramatic look the diffusion could have been removed as the light was a hard source (if you’re unsure of the difference between hard and soft light, check out this post on why we need both).


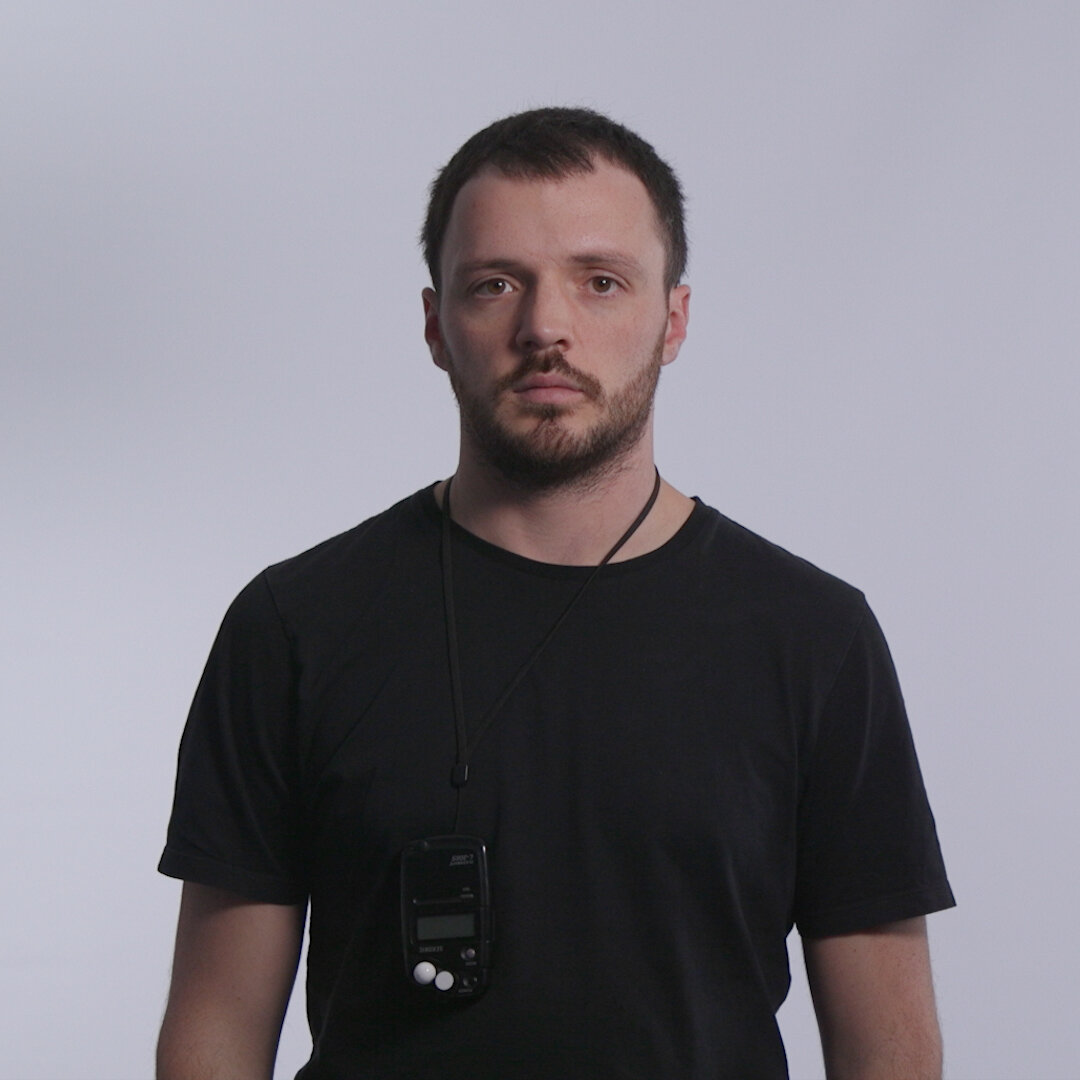
The 3/4 backlight and hairlight for reference. Feeling a bit sinister!
6. Add a hair light or rim light
And the pièce de résistance! If time allows, a hair light or rim light should be set up. This is the most time consuming light to rig, however if you want the best results then it is completely worth it. Rigging it outside of a studio requires a boom stand or a flexiarm with enough counterweight to stop it toppling over. In this case we rigged a dedo Ledzilla battery powered light onto a boom stand, with the base off the left side of frame and the light itself about a foot behind the subject. The light was a fairly hard source and no diffusion was used as the subject’s hair was dark. It was angled towards the head and shoulders and the barn doors closed to avoid any spill flaring into the lens.
For subjects who are blonde or bald, the hair light can easily become overpowering or in worst cases unflattering. In these situations the light should be angled down so it misses the top of the head and rims the shoulders instead.
7. Fine tune your brightness levels
Before you start rolling make sure to fine tune the brightness of each light. Make sure your background lights are bright enough to render the white pure, ensure the subject’s skin isn’t overexposing, set your exposure and check your camera’s white balance matches that of the lights. Then, you’re off and can focus on capturing some great content!
Before and after
If we look at the final (ungraded) image and compare it with the previous steps we really start to see how much better the image looks than if we had stopped earlier in the process, even before colour correction.
With the hair light removed it still looks pretty good, but it lacks that punch.

It’s subtle, but with that 3/4 backlight gone as well as the hair light the image looks flat and boring now. You often don’t realise you needed a light until it’s gone!

Now we’ve removed the fill light and the difference is much more dramatic. Whilst the soft shadow from the key light wraps around the face nicely, without any back or hair lights it’s just starting to look a bit lifeless now. Not the desired look for this scene.
We used a total of 6 lights to create this setup, however if we really wanted to we could have added a seventh light for another 3/4 backlight on the right side of frame. We actually decided against this here because of time constraints and framing, as the client had asked for text to appear on the right of screen, plus the backdrop was doing a pretty good job by itself.
Here are some behind the scenes images of our setup:
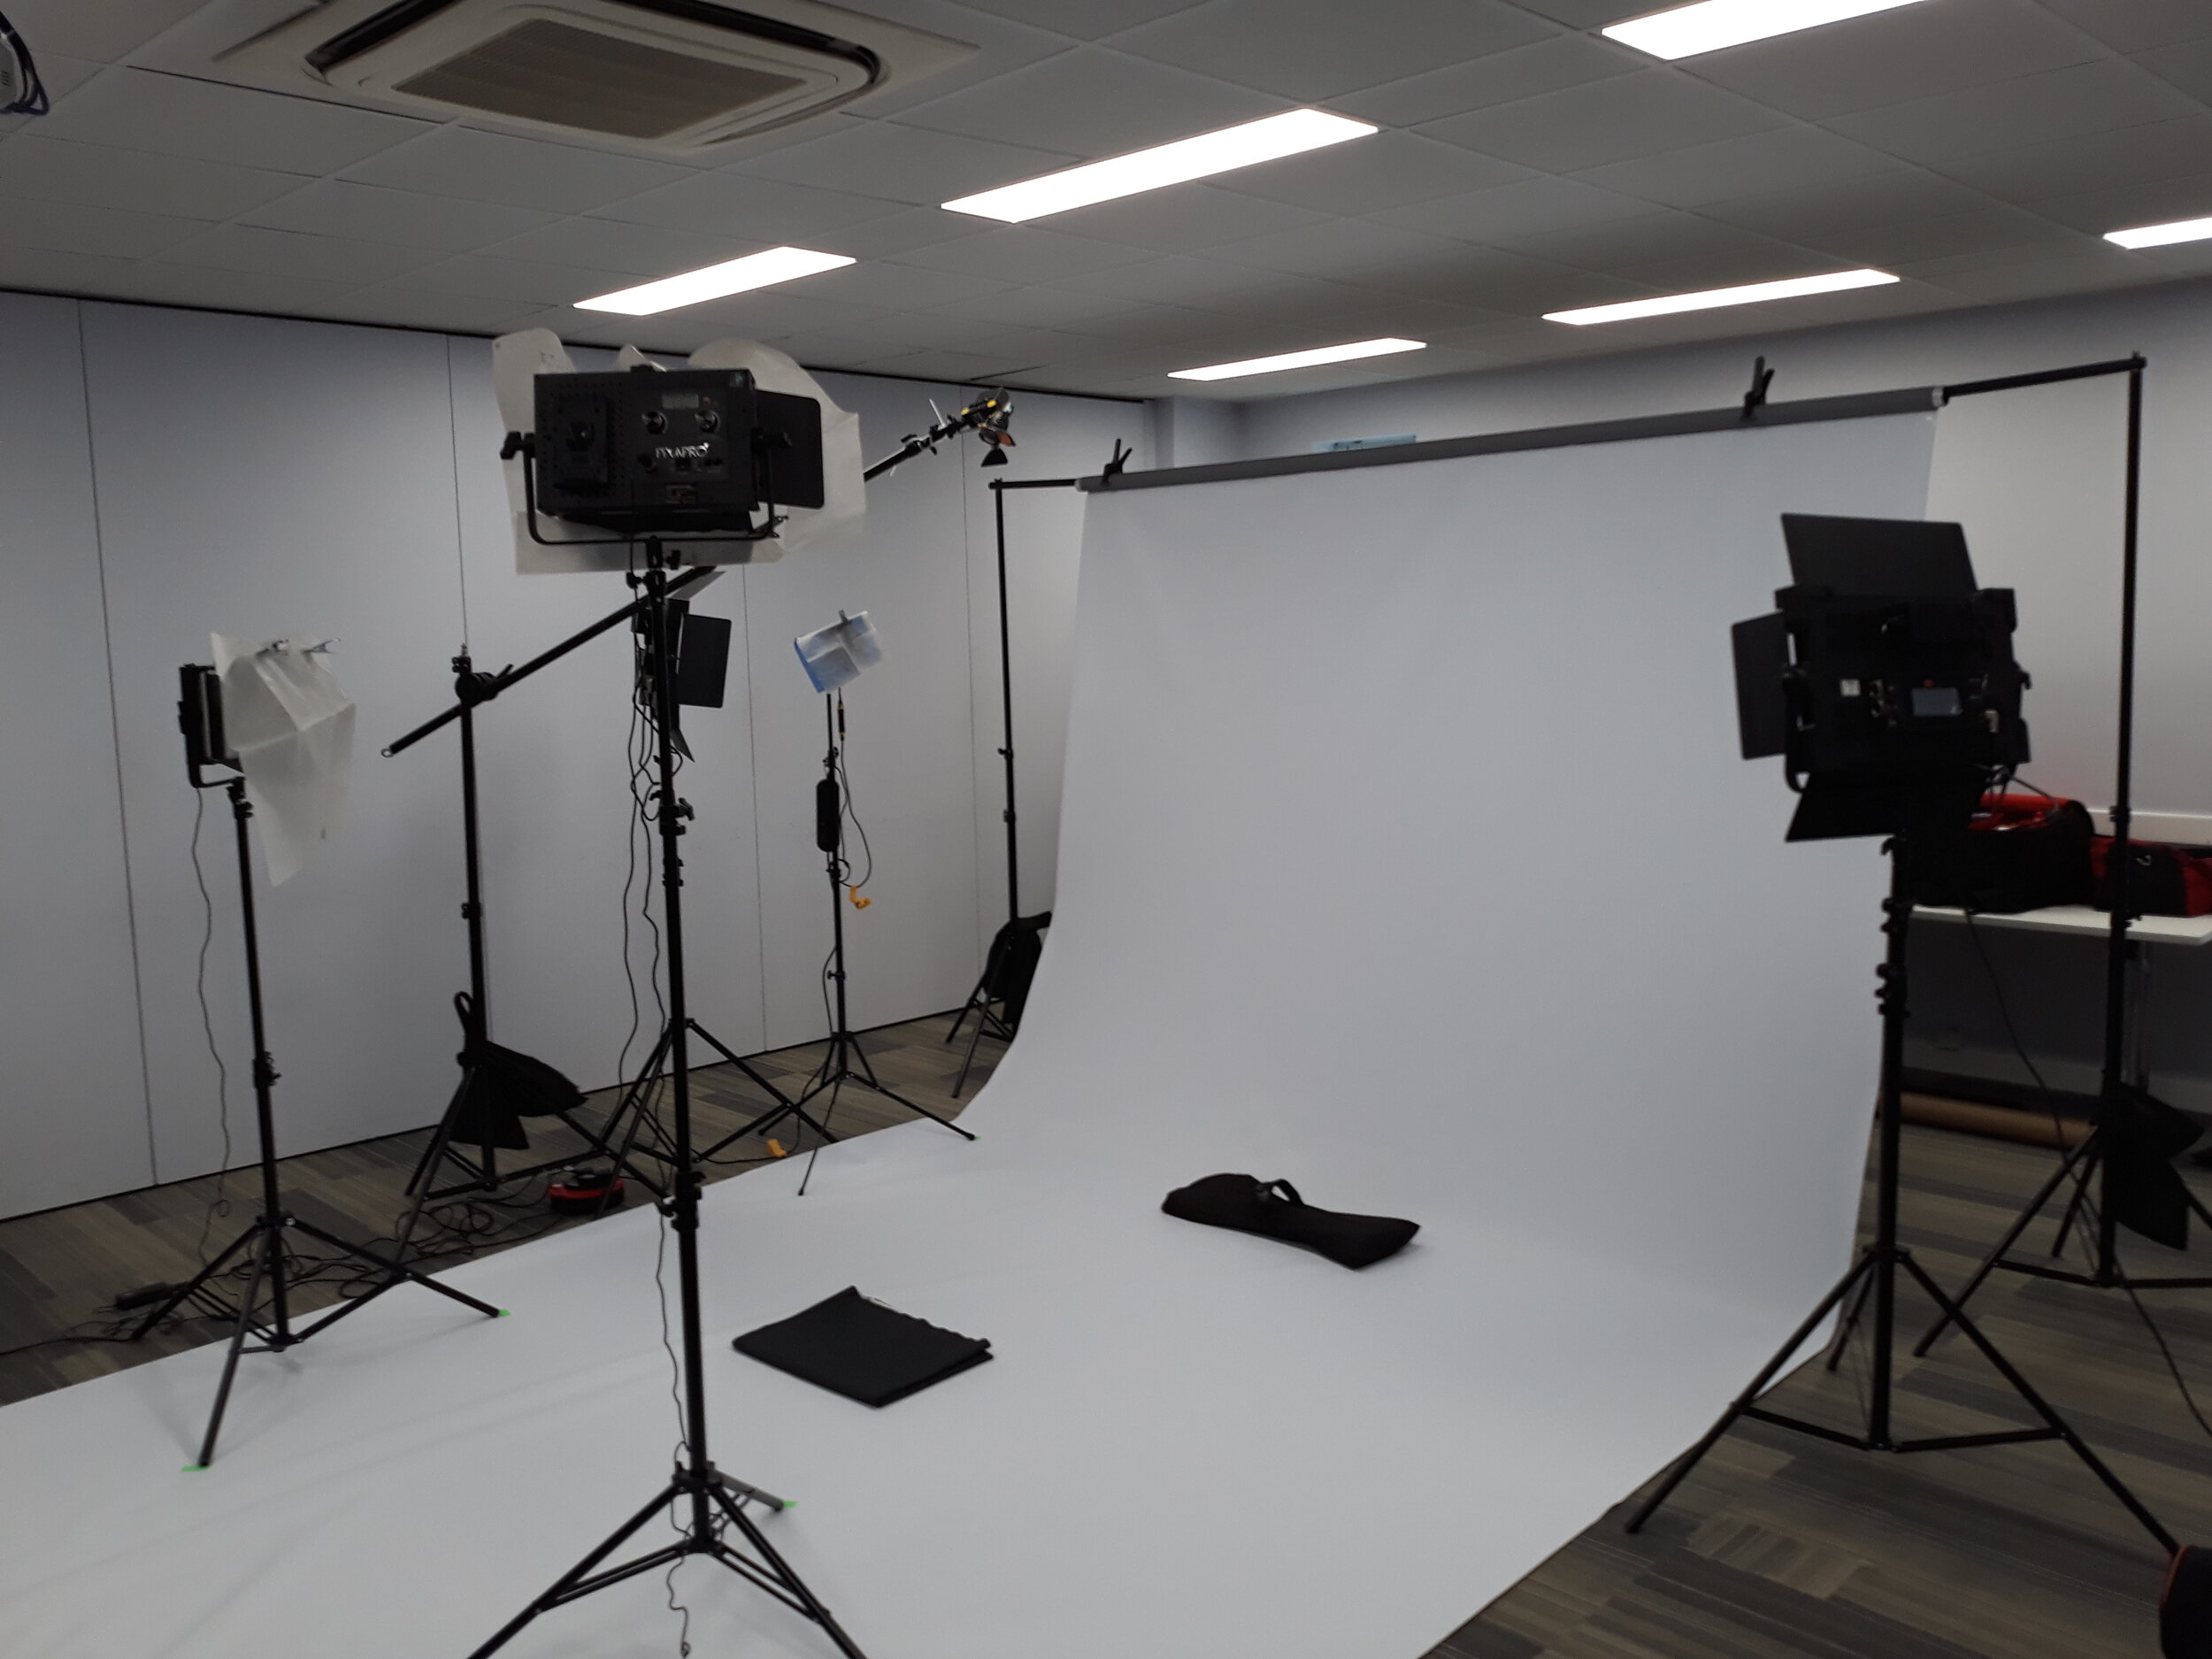
Our setup in an empty office. Good thing we had lots of space here because we needed it!

On set with the client. For you fellow lighting geeks we used the following fixtures: Key & fill: PiXAPRO VNIX LED1000B, hair/rim: Dedolight Ledzilla, 3/4 backlight: Dedo DLH4, background lights: LS Edge 1380ASVL Bi-Colour Soft LED Light
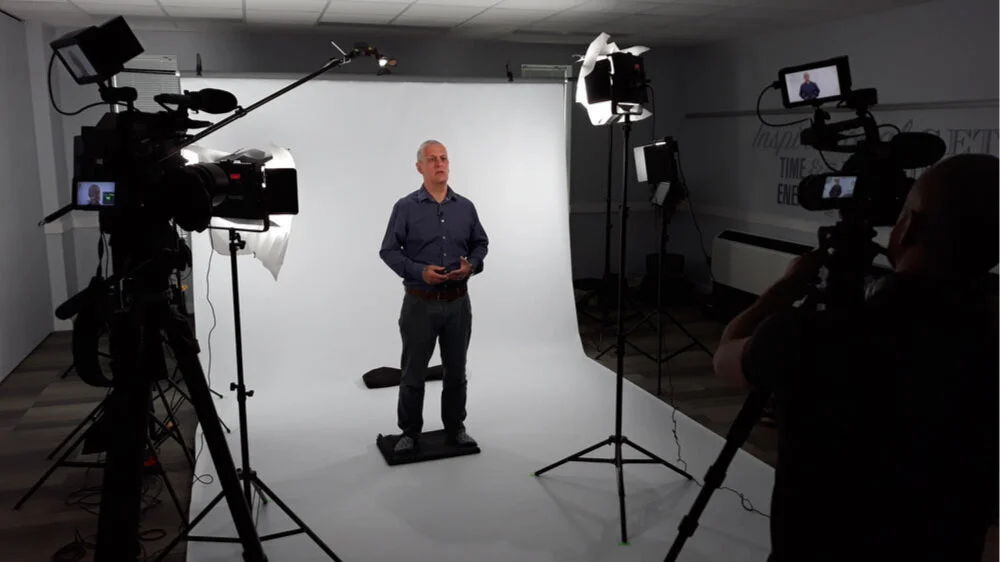
Our setup allowed for 2 cameras to shoot - one on a medium shot and the other on a close up. With 325productionsUK
You may be thinking that’s a lot of lights and quite a complex setup for what appears to be a straightforward look. Well, that is what effective lighting is all about. Yes, it can be bulky but the extra effort is the difference between high end and cheap!
Enhancing the backdrop in post
When you get into the edit you may find your white backdrop isn’t looking as pure white as you’d initially hoped, especially if your backdrop was slightly underexposed. If this is the case then you’ll need to do a spot of keying along with any other colour correction to the image. This is where you’ll be glad you lit your backdrop evenly and made your talent wear darker clothing!
In this example I used After Effects, specifically the Luma Key feature. I won’t pretend to be an After Effects expert (like lighting, you never stop learning it!) but this was the method I used and if you’re fairly familiar with After Effects it shouldn’t be too difficult. There are other methods available such as the extract and rotobrush tools but I’ll leave those to the After Effects gurus to explain, as they can take a bit of practice to fully understand. I’d highly recommend this tutorial for how to use the rotobrush tool as its saved my bacon a few times!

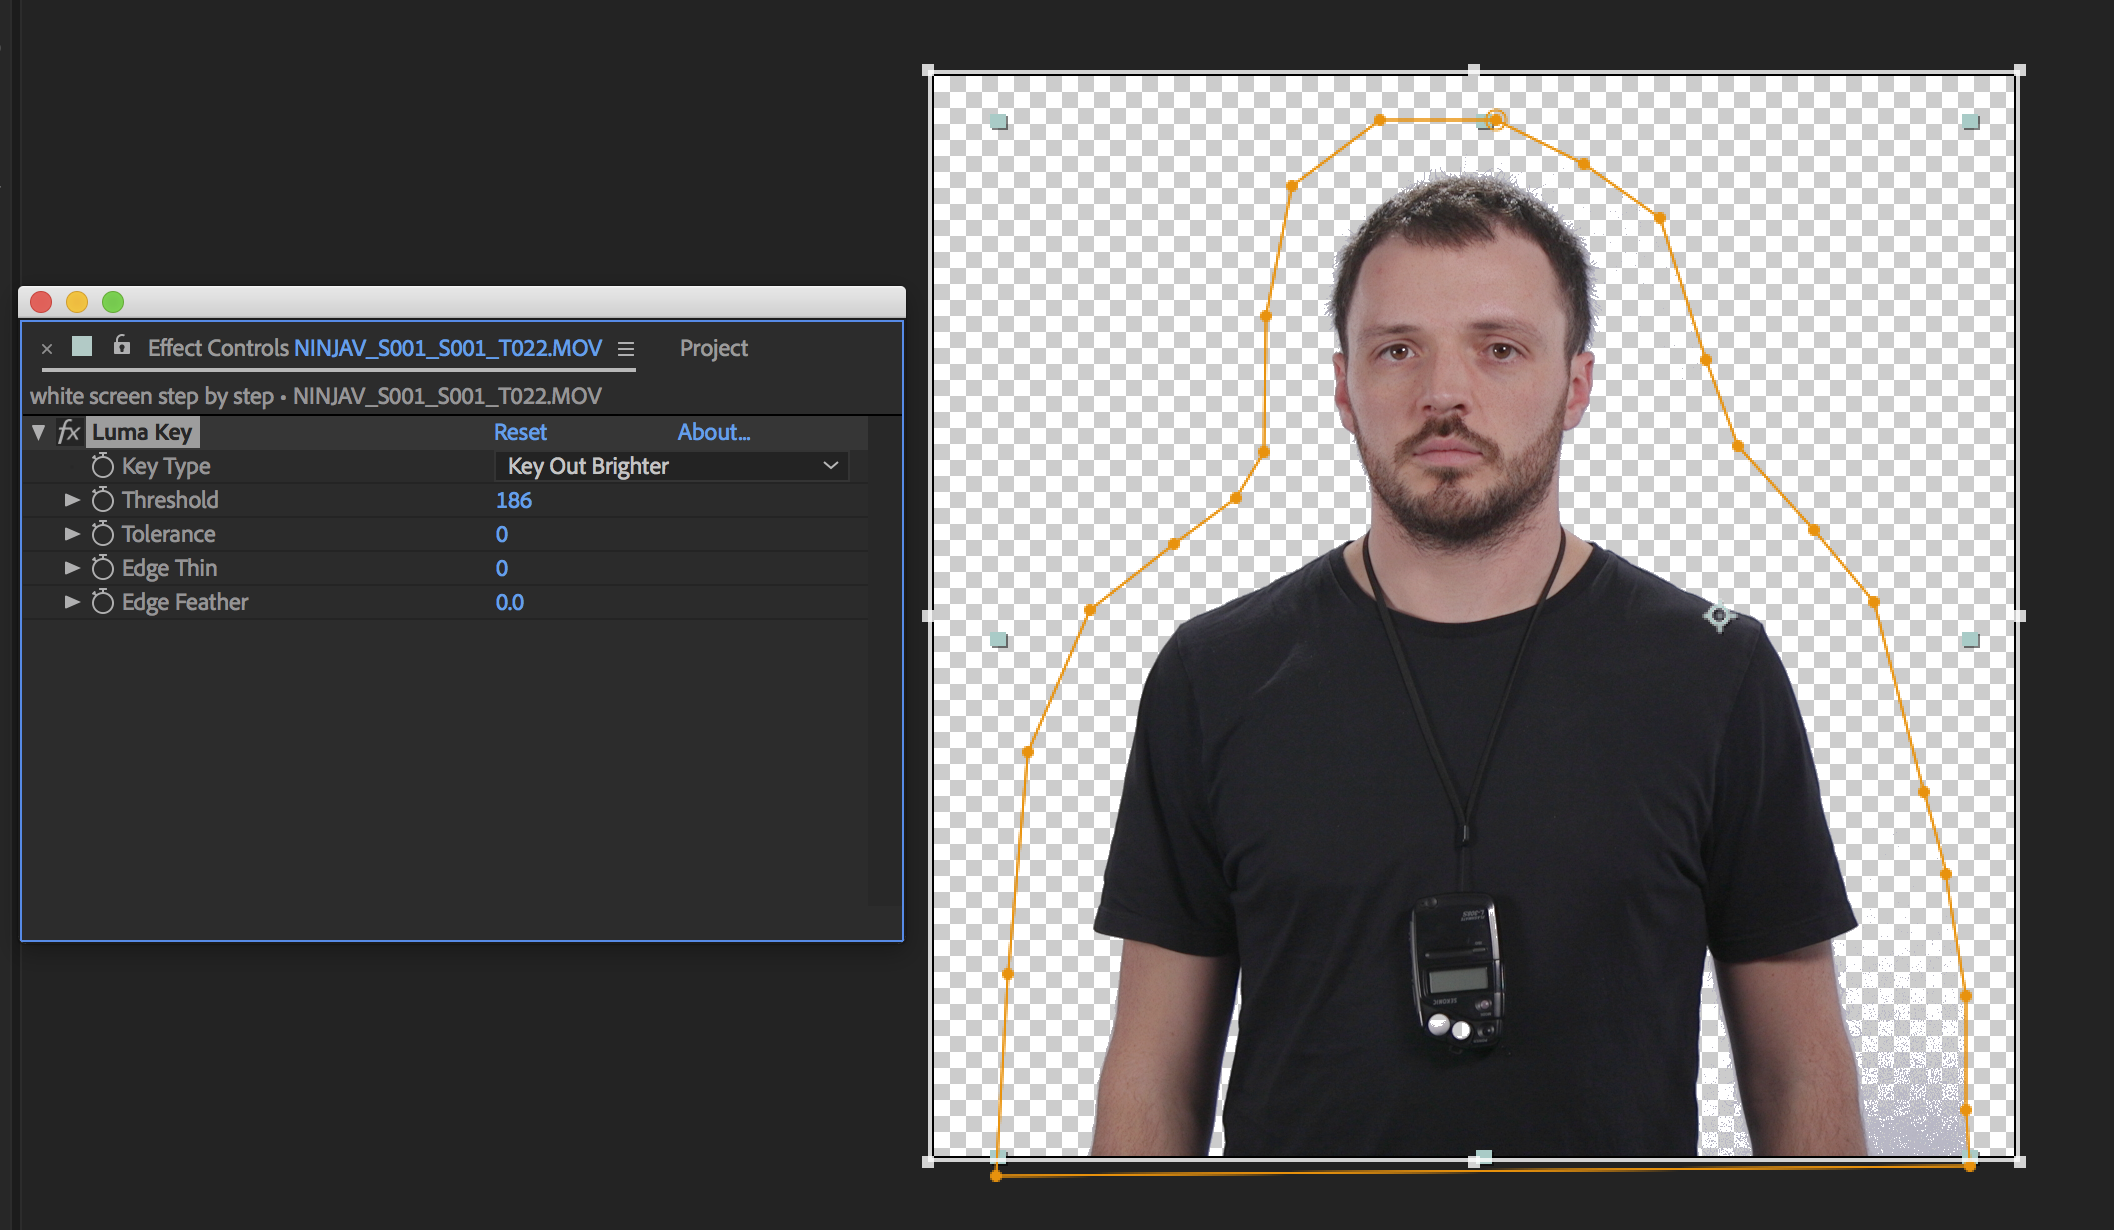
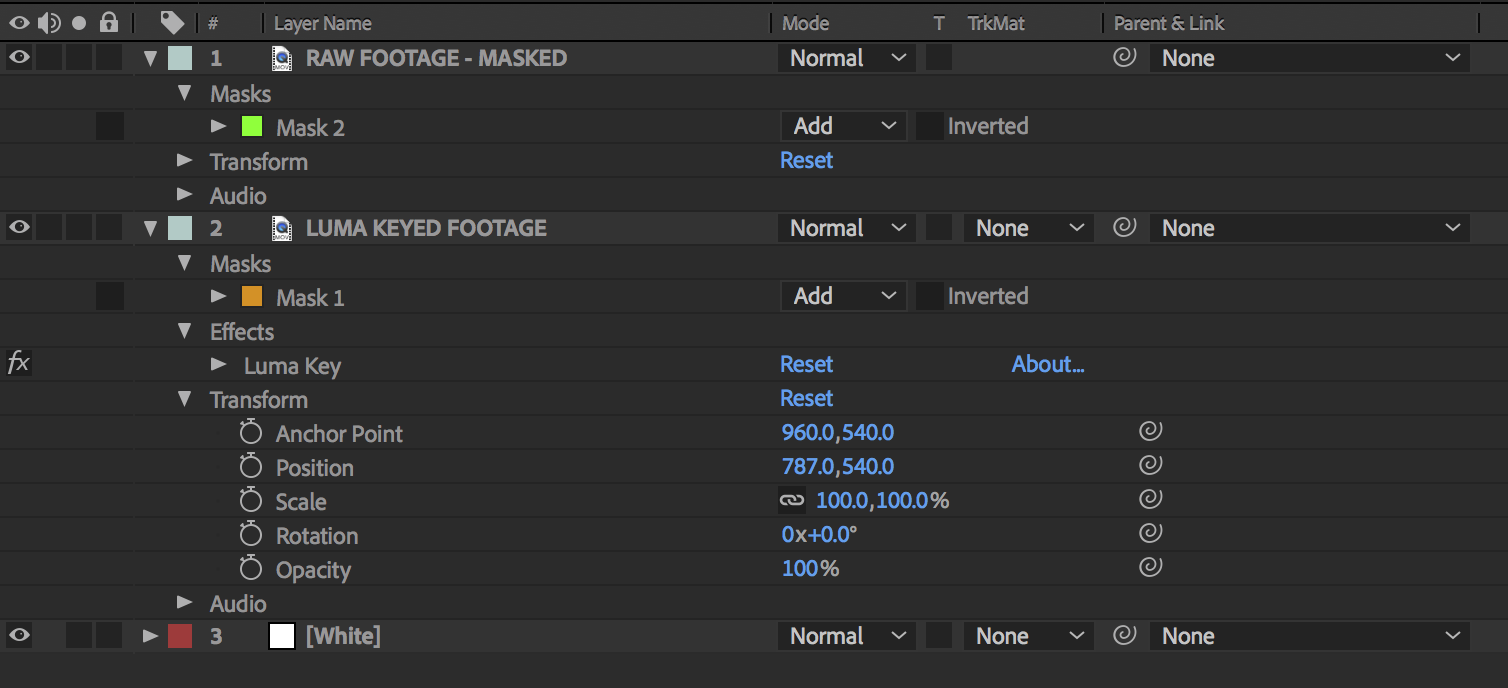
I started by using the pen tool to mask out a rough outline around the subject.
After applying the luma key effect to my footage I then selected ‘Key out Brighter’ and adjusted the threshold until the backdrop was completely keyed out. I then added a small amount of edge feather to smooth the edges out; just enough without letting pure white creep onto the subject.
If the luma key process starts keying out your subject’s skin then you’ll need to apply another mask. Duplicate the footage layer and remove all of the effects on the new layer. Add a mask to the area you don’t want keyed out and set it to ‘add’ to ensure any white isn’t removed from the face. Hopefully your subject won’t be moving too much, so the mask should require very minimal keyframing (if any).
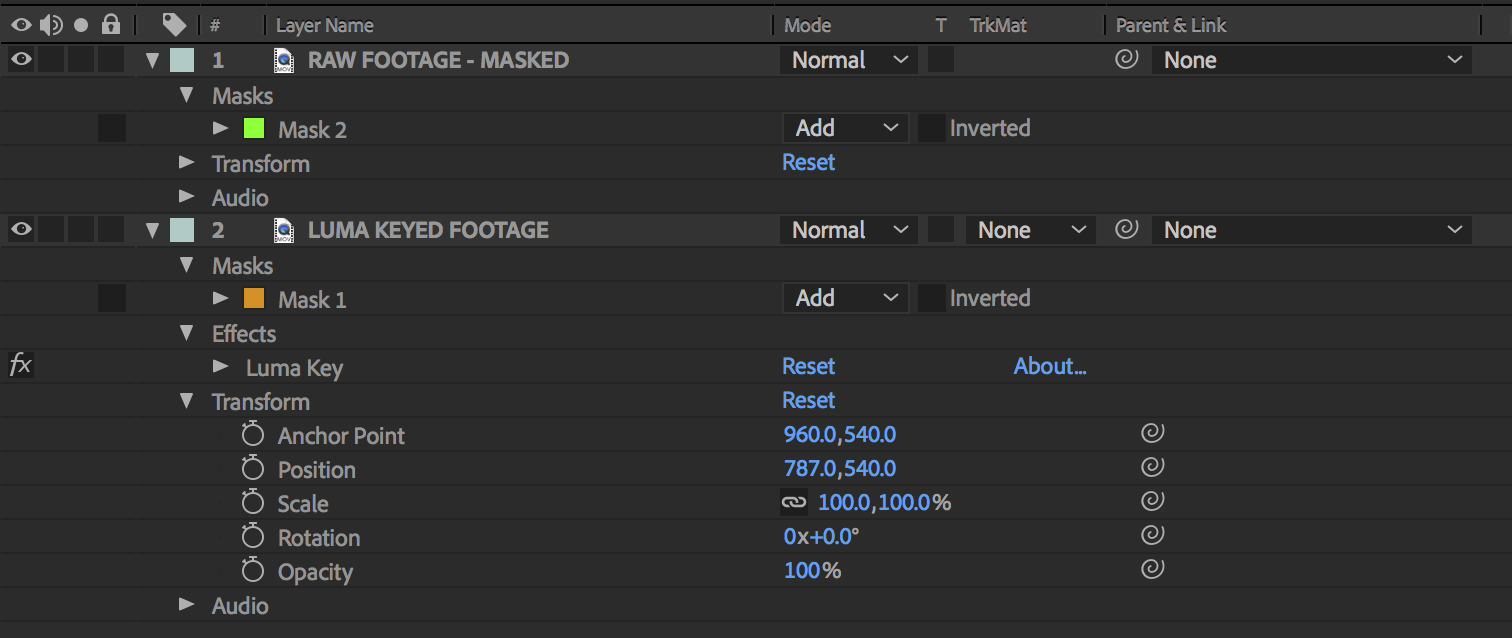
In my case the skin was fine but the lumisphere on the light meter was being keying out as it was white, so I made sure the mask covered this.

Lastly, add a white solid (you could add a gradient to it too if you wish) under the 2 layers of footage to be used as your background.


In addition to the backdrop you may also need to do a small amount of colour correction to the image, especially if using a mixture of lighting fixtures. Some will have more accurate colours than others (some LEDs can look slightly green and gels can get discoloured over time) but as long as you have matched the colour temperatures and set your white balance correctly this should be a minimal amount of work. You may want to add some contrast, vibrance and/or adjust the RGB levels should any of your fixtures lean towards an unflattering colour.
And..voila!
Alternative looks

Lets return to the lighting for a moment. The beauty of video and film production is that there are many different approaches to lighting scenes. A method for one style of production may not fit another. So, if you’re thinking of shooting against a backdrop and want it to look professional but a bit more dramatic - perhaps your subject matter is of a serious nature or you just prefer higher contrast - then we can still use this setup but turn off certain lights to completely change the look.
To demonstrate this I decided to turn off the lights on the backdrop to give it more contrast. In an ideal world we would have switched backdrops, but this wasn’t available to us at the time. However, what you can see by doing this, even with a white backdrop, is how much contrast is added simply by turning off these lights. Because we have separation, the light from the key and fill drops off so it illuminates the backdrop somewhat, but it no longer looks white. In my opinion the extra contrast actually looks more interesting!

However, my personal favourite is when we darken the backdrop and remove the fill. This makes for a high contrast, punchy look that still looks professional. Notice how the shadow from the key wraps around the face just enough before the 3/4 backlight allows it to keep its three dimensionality. For the right kind of subject matter it would be perfect. If it’s a little too dramatic for you, the fill could still be used but dimmed to make it a bit more subtle.
The bottom line: experiment
What makes lighting so interesting and exciting is the fact that there are many variables and approaches available to us. You can read all the theory you like, but at the end of the day the best way to learn what you can do is to experiment! So, forget which camera just got released, forget about lenses - pick up some lights and see what you can create to raise the production values on your video projects.