5 Video Editing Techniques I Couldn’t Be Without

There’s more to video editing than just putting footage on a timeline and tapping a few buttons. The style of cutting can make or break a project!
When creating a video maintaining good pace is, in my opinion, probably the most important goal for an editor, besides meeting a deadline. We want to engage our audience and help you achieve a good ROI, so it’s important that we get this right. The visual style of a sequence plays a major part in achieving this. So, let’s put subject matter and narrative structure to one side for a moment and focus on how creative editing techniques can be used to spice up sequences and keep audiences engaged.
I previously spoke about how to enhance your talking head videos, which covered both filming and editing techniques, but in this post I’ll be talking specifically about creative ways to edit the footage. It mostly covers b-roll material, but some can be applied to piece-to-camera segments as well.
Below are just a few of the creative techniques I use in my projects; most of which are actually quite straightforward to use! I’ve found out from experience that a lot of it is down to personal taste - what works for one client isn’t necessarily a good fit for another. The important thing is to find the right techniques for your project and avoid anything that looks tacky or will age badly. Ultimately, creative techniques such as these should be matched appropriately to the target audience in question.
So, excluding traditional hard cuts and cross dissolves (which are staples of most moving image content), here are 5 creative editing techniques that I personally couldn’t be without. Each of these methods balances the modern with the tasteful, and for the most part, doesn’t take much time to implement. Could any of your projects benefit from the approaches below?
Time remapping
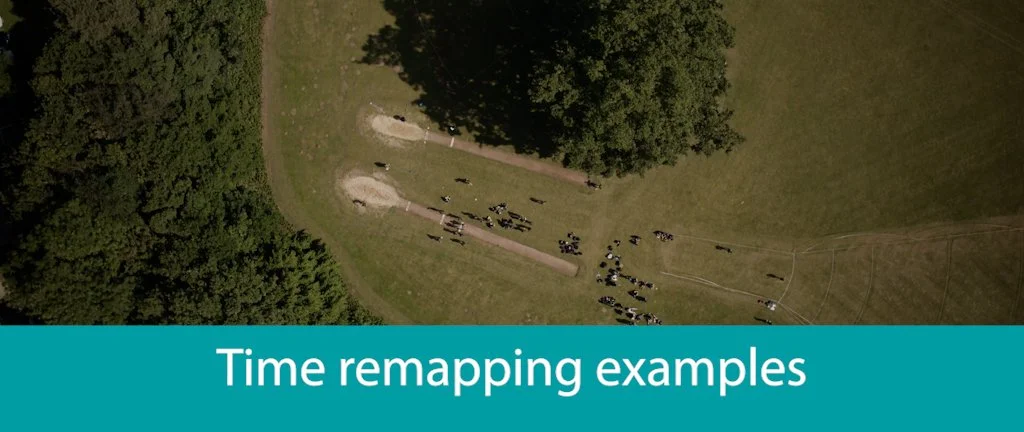
Time remapping is commonly applied to drone and slow motion footage [no sound]
Time remapping is the process of changing the speed of how footage is played back, without cutting. It’s a technique often used in sports footage, such as a striker in a football match running past defenders at ‘normal’ speed and then landing the ball in the net in slow motion. How slow the motion is depends on the framerate it was captured in, but commonly this may be half speed or quarter speed. However, it doesn’t just have to apply to sports footage and very often I’ve seen this technique used in establishing shots of locations and in travel programmes.
I often find that a nice shot with movement will have been captured, but it just lasts too long on screen, so time remapping allows you to use the best bits of the shot without it dragging on for too long. A bit of experimentation is required here to get it right, but it can be fun and if used tastefully, can inject a lot of energy into a sequence.
2. ‘Super-zoom’ transition
There are many flashy transitions out there, but this one in my opinion is exciting enough to grab your attention, without being tacky. I find it works best when cutting from aerial footage to ground footage or when jump cutting from a wide shot to a close up of the same scene. It can also work well as a background for graphics that are appearing on screen too. Watch the examples here and try not to get even just a little bit excited!
3. Piece to camera ‘collage’

In the examples here for Chiswick School and Langley Heritage Primary, both clients wanted to show how inclusive their environments were for new entrants, so the piece to camera ‘collage’ technique worked really well.
Unlike the other examples here, which can all be added in the editing stage, this technique needs commitment at the pre-production stage, in that it needs a script in place. It involves several participants speaking the same line to camera but editing them in such a way so that each person says only one word at a time and the resulting sentence creates a ‘collage’. They don’t necessarily need to all be in the same location, but if you’ve got a lot to get through on the shoot day it may be wise to schedule this all together! Granted, this technique doesn’t work for every project, but for the right subject matter it can be a really nice way to energise a sequence, particularly for light-hearted pieces.
If one word per person isn’t appropriate, another similar technique is to feature lots of people delivering single sentences to camera (not saying the same thing) and cutting between them quickly. Add in a slow zoom in for each and you can cover a lot of ground with lots of energy! Once again, this needs to be scripted.
4. Smooth push transitions
Flipping through various projects with push transitions and an example of swiping through them on a phone in a green screen effect shot! [no sound]
Push transitions with smooth acceleration and deceleration are stylish ways of moving between clips and are perfect for social media content, as they replicate the effect of someone scrolling through a feed. You can move clips in and out in all directions and they can take as long or as short a time to move as you like. They also don’t just apply to footage - they can be used on graphical elements too. Simple, but effective - I can’t live without them!
*For anyone interested, I use Mister Horse and Film Impact Transitions plugins for Adobe Premiere and After Effects to create these, but they can also be easily created manually by animating keyframes with curves in After Effects and other similar professional software packages
5. Split screen
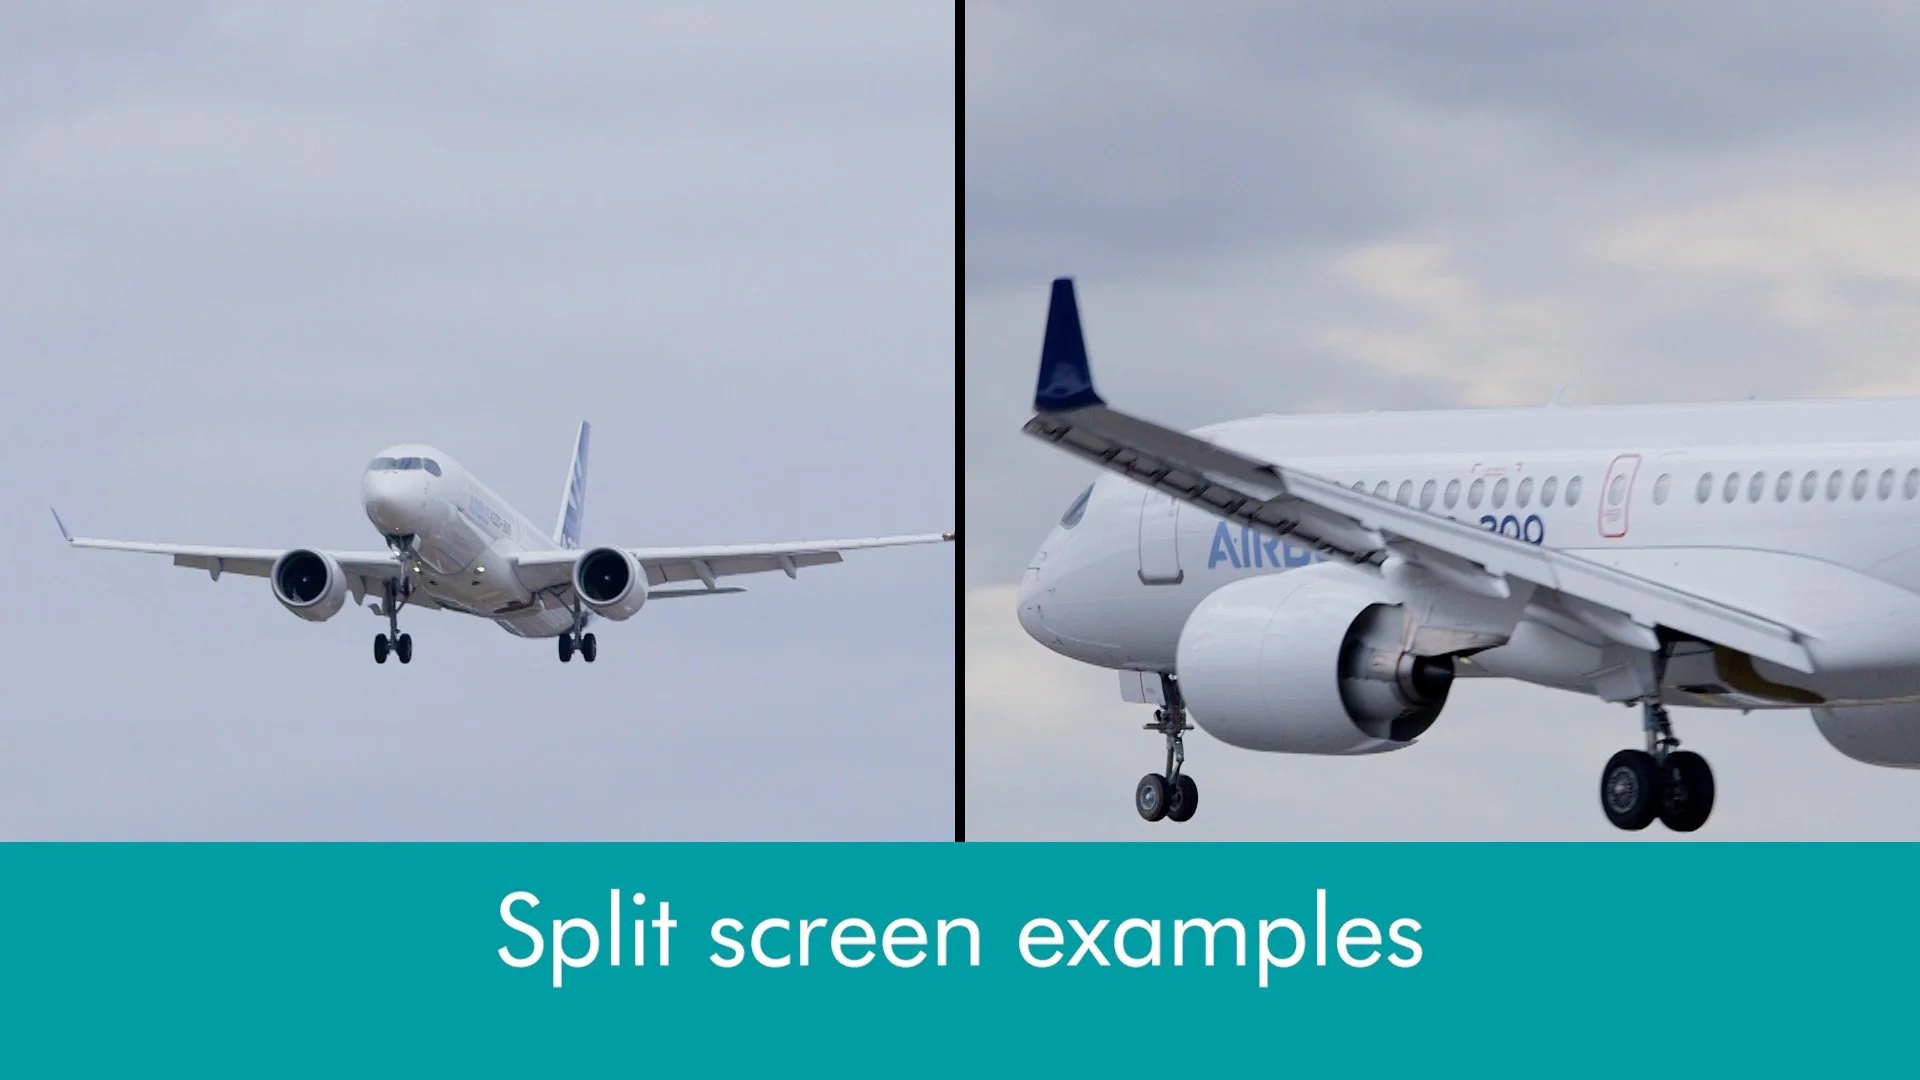
Some split screen examples using footage captured at Farnborough Airshow and a highlights reel for HSJ events [no sound]
Did you ever watch the U.S. show 24 back in the day? It was a personal favourite of mine, and one of the reasons it was so interesting was down to its use of split screen, especially in the earlier seasons. This technique wouldn’t be appropriate for every project, but when it’s used it’s undeniably interesting as it shows a lot of content at once. It can be stylish and fun, especially when moving the screens around the frame. Footage doesn’t always have to be the same size either; one clip can dominate 2/3rds of the frame, while another can fill the other third, for example.
Bear in mind that if you would like to use this style for your project it can take a bit of extra time to rescale footage effectively, especially if screens are moving around a lot. Render times will also be a bit longer due to the number of clips playing at once. But if it suits your project, then it’s worth the effort!
So, there you go; hopefully these techniques will inspire you to create some exciting moving image sequences in your next project. But don’t forget - the beauty of video production is that there are many ways to approach a brief. Creativity is subjective, and that’s what makes it such an exciting field to work in!
If you want to find out a bit more about the video editing process in general, I cover it briefly here. I also have a couple of examples of how graphical elements can be used to enhance your projects here.
Thanks for reading.